
Hey everyone! Today you’re going to learn how to read a simple crochet pattern in this easy to follow guide for beginners.
Who here is new to crochet and ready to start their first project? Maybe you’re looking to try something simple like a scarf or a throw, or maybe you’re wanting to try your hand at crochet in the round to make a hat. No matter what you decide, chances are you’re probably going to want to find a pattern to guide you through whatever it is that you’d like to make. You can find loads of free patterns by doing a quick Google search (my personal favorite place to look for patterns is Pinterest).
But once you do find your pattern, if you’re anything like most beginner crocheters you’ll probably run into a slight issue: just how do you read a pattern?? Trying to read a pattern can sort of feel like trying to decipher a secret code with all of the unfamiliar abbreviations and terminology.
Not to worry! Today I’m going to break down the structure, terminology, and abbreviations of a basic crochet pattern, and you’ll be on your way to creating your first masterpiece in no time at all.
Understanding the Structure of a Crochet Pattern
Most patterns follow a standard format that generally includes:
- Skill level- indicates whether the pattern is beginner, intermediate, or advanced
- Materials- lists the yarn type, hook size, and any other supplies needed for the project (more about hook sizes and yarn type coming in a later post)
- Gauge- provides a general measurement for the project to ensure yours comes out the right size
- Stitches and abbreviations used- lists the crochet stitches and abbreviations used in the pattern
Common Abbreviations
Most patterns use abbreviations to save space. Here are a few of the most common.
| Abbreviation | Name |
| ch | chain |
| sc | single crochet |
| hdc | half double crochet |
| dc | double crochet |
| tc | triple (or treble) crochet |
| sl st | slip stitch |
| inc | increase |
| dec | decrease |
| fo | fasten off |
| mr | magic ring |
| st(s) | stitch(es) |
| rep | repeat |
| rnd | round |
For example, if your pattern says, ‘Ch 10, sc in the 2nd ch from hook and in the next 8 st’ then you would first make 10 chains, then do a single crochet in the second chain closest to your hook, and go on to work 1 single crochet in each of the next 8 chains. That would leave you with 9 total stitches and you would have worked across your entire chain.
Pattern Repeats
This is where it gets a little tricky! Lots of patterns, especially the more advanced ones, will have you repeat a certain set of instructions or stitches at some point. You’ll usually see brackets ( [ ] ), parentheses ( ( ) ), or asterisks ( * ) to indicate repeats. Sound confusing? Here’s an example to clear things up.
‘Ch 1, *sc in the next 2 sts, inc*, repeat from * to * until end of round’
So what you would do here is first make a chain stitch, then repeat everything within the brackets until you get to the end of the round. In this case what you’re repeating is make 1 single crochet in each of the next 2 stitches, then make an increase into the next stitch, until you’ve worked all of the stitches in the round.
Brackets and parentheses work the same way.
‘Ch 1, [(dc, ch 2, dc) in the next st] 2 times’
Here you would make a chain stitch then work the repeat, which is 1 double crochet stitch, 2 chains, then 1 more double crochet all in the same stitch, for a total of 2 times.
Working in Rows or Rounds
A pattern is either worked in rows, meaning you go back and forth and turn your work at the end of each row, or in rounds, meaning you work in a continuous or joined circle. Projects like scarves, blankets, and some garments are usually worked in rows, while most hats, stuffed animals, and granny squares are worked in the round.
If you’re working a round-based pattern, the first round of the pattern might say something like ‘Rnd 1: Ch 2, 8dc in mr. Join with sl st to 1st st’.
In this case you would start off with a magic ring (I’ll be posting a tutorial for this soon but in the meantime YouTube is very helpful for learning this) then work 2 chains and 8 double crochets into it. Then you would work a slip stitch into the first double crochet you worked that round, thus joining your round and forming a compete circle.
If you’re working a row-based pattern, the first row of the pattern might say something like ‘Row 1: Ch 10, sc in the 2nd ch from hook and in the next 8 sts. Ch 1 and turn’
Here you would first make your 10 chains, do a single crochet into the 2nd chain from your hook and into the next 8 stitches, and lastly make 1 chain. Then you would flip your work so that you’re looking at the back side of it, so that you’re now able to go back over the stitches you just created this row when you start row 2.
Stitch Count
If you’ve noticed many patterns actually have a little number in parentheses at the end of every row or round, like this:
Rnd 1: Ch 1, 6 sc in mr, join to 1st sc. (6)
Rnd 2: Ch 1, (inc) in each st around, join to 1st sc. (12)
Rnd 3: Ch 1, (sc in next st, inc) around, join to 1st sc. (18)
Rnd 4-5: Ch 1, sc in each st around, join to 1st sc. (18)
That little number is the number of stitches you should have for each round, so if you count your stitches after you complete each round it’s a pretty good way to make sure you’re doing everything right. It’s a lot easier to catch a mistake if you notice your stitches are off in the last round than if you go your entire project without counting then realize towards the end that you’ve made a mistake early on.
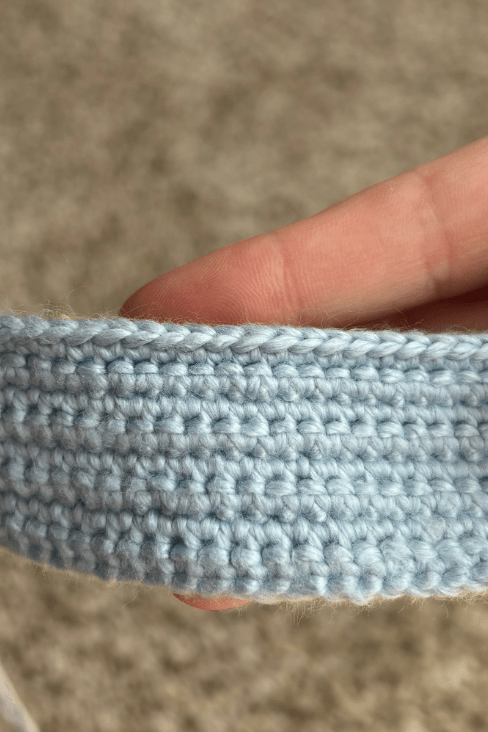
Checking Your Gauge
I’m gonna be honest on this one: I really never check gauge on a project, not unless I’m working on something like a garment that needs to be a specific size. It doesn’t matter so much if you’re making something like a blanket or a teddy bear, but it definitely matters on pieces of clothing that you want to make to fit certain measurements. If you want to make sure that your project is going to turn out the exact same as the pattern you’re trying to make, checking your gauge beforehand with whatever yarn and hook you plan to use is the only way to do so. And even if you use the exact same type of yarn and hook that the pattern writer uses, it’s not a guarantee that your project will come out the same size since every crocheter has a slightly different tension when they crochet! I tend to crochet slightly tighter while my mom crochets a little looser. We can make the same pattern with the same hook and yarn and mine will always come out a little smaller.
Most patterns include gauge after listing the materials you’ll need for the project. Usually it looks something like this: ‘Gauge: 8sc x 10 rows = 4” x 4” ‘
That just means that 10 rows of 8 single crochets needs to measure 4” by 4”. If you work up a swatch of 10 rows of 8 single crochets using the yarn and hook size according to the pattern, your work should measure pretty similar, but if it doesn’t then all you have to do is adjust your hook (or even yarn!) size accordingly.
Final Tips
Just a couple of things to make following a pattern a little easier on you:
- Print out your pattern if you’re following one online. That way you can easily highlight or underline repeats and mark off what row or round you’re on so you don’t lose count.
- Buy some stitch markersif you’re working in the round. They make it a lot easier to keep track of the first stitch of every round.
- Read through a pattern before you start it. Then you’re able to pick out any stitches or techniques you aren’t familiar with.
- Start with something simple like a coaster or a granny square. It’s easy to feel intimidated when you start off with a super advanced pattern! You can also find booklets of patterns tailored to beginners online or in craft stores.
And that’s a wrap! Once you master the basics and get a bit of practice in, you’ll be well on your way to creating masterpieces in no time!


Leave a comment